Why Getting Dog Paw Pad Trimming Right Matters for Your Dog
Dog paw pad trimming is one of the most overlooked parts of at-home grooming — but it has a direct impact on your dog's comfort, safety, and health.
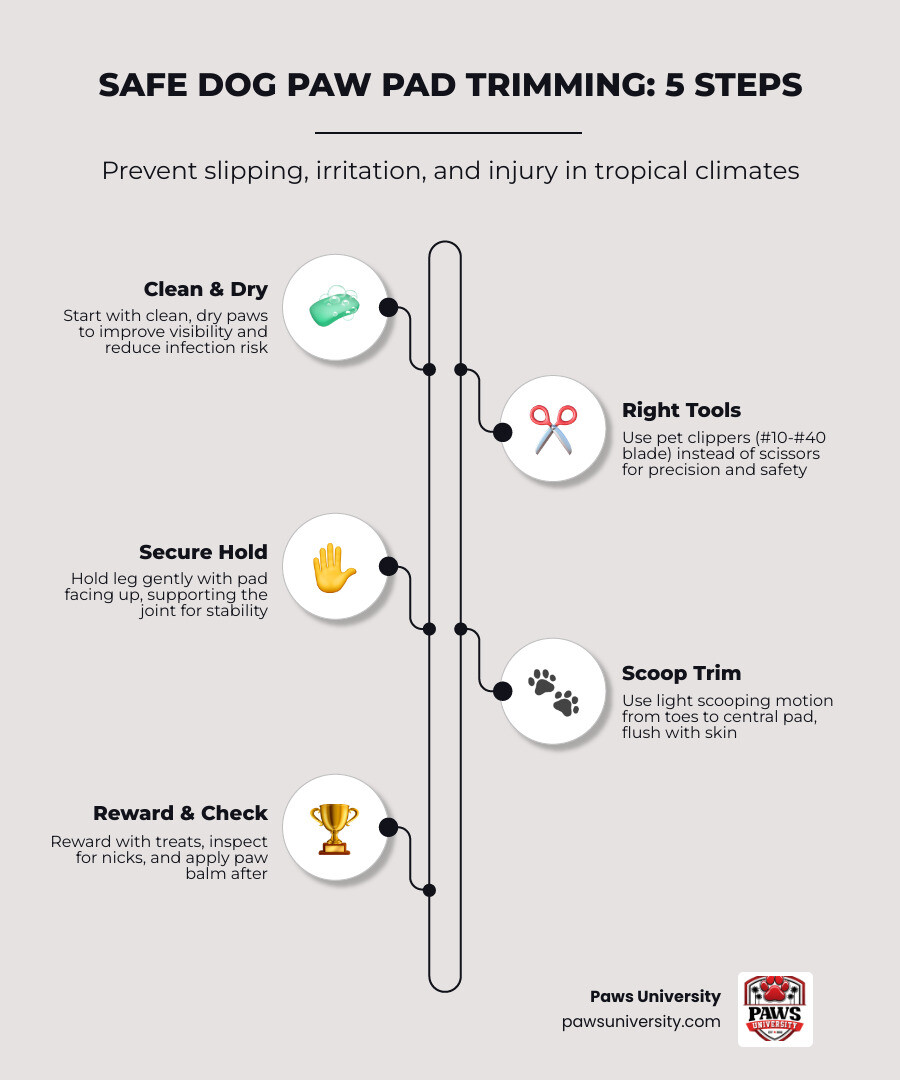
Quick answer: How to trim dog paw pads safely
- Work on clean, dry paws
- Use pet clippers (not scissors) with a #10 to #40 blade
- Hold the leg gently but firmly with the pad facing up
- Use a scooping motion from toes toward the large central pad
- Trim fur flush with the pad — don't dig in or apply heavy pressure
- Reward your dog with treats throughout
If your dog is slipping on tile, tracking mud indoors, or chewing at their feet after walks, overgrown paw fur is often the cause. Long hair between the pads collects dirt, grass seeds, and moisture. It reduces traction. It can mat tightly against the skin and cause real irritation.
The good news? With the right tools and technique, this is a quick job — 10 to 30 seconds per foot for most dogs.
I'm Allen Daniels, co-founder of Paws University in Kailua-Kona, and I've spent over 25 years working with dogs of all breeds and temperaments using rewards-based methods — including guiding pet owners through stress-free dog paw pad trimming as part of a complete grooming routine. Below, I'll walk you through five practical methods so you can do this safely at home.
Why Dog Paw Pad Trimming Is Essential for Health and Safety
Our dogs' paws are their direct connection to the world. In our warm, tropical climate here in Hawaii County, dogs are constantly active on a variety of surfaces—from sandy beaches to grassy lawns and volcanic rock. Keeping the hair between their paw pads neatly trimmed is not just about looking sharp; it is an integral part of a complete pet groom that directly affects their physical well-being.
When the hair on the underside of the paw grows too long, it covers the leathery pads that naturally provide grip. According to the guide on How to Safely Trim the Hair Between Your Dog's Paw Pads, letting this fur grow unchecked can lead to a host of structural and hygiene issues.
Overgrown fur acts like a slick pair of socks, causing dogs to lose their footing on smooth indoor floors. Furthermore, the warm humidity of our island climate can trap moisture in dense paw hair, turning the spaces between their toes into breeding grounds for yeast and bacteria.
Preventing Slipping and Improving Mobility
The primary function of paw pads is shock absorption and traction. When thick tufts of hair grow over these pads, dogs lose their natural grip on smooth surfaces like hardwood, laminate, or tile.
For young, energetic dogs, this lack of traction can lead to sudden slips, joint strains, or muscle pulls. For senior dogs, especially those dealing with arthritis or hip dysplasia, slipping is incredibly dangerous. To compensate for the lack of grip, dogs will often splay their feet or alter their natural gait. Over time, this constant joint strain can lead to chronic pain, splayed feet, and skeletal misalignment. Regular dog paw pad trimming restores their natural stability and keeps them moving confidently.
Avoiding Dirt, Debris, and Skin Irritation
Long paw hair acts like a broom, sweeping up everything your dog walks on. During outdoor adventures in Hawaii County, this means their paws easily collect black sand, dirt, twigs, and burrs.
More dangerously, overgrown fur can trap sharp grass seeds and foit-seeds, which can work their way into the delicate skin between the toes, causing painful abscesses. When debris gets caught, it quickly forms tight mats. These mats pull on the skin with every step, creating a sensation similar to walking with pebbles in your shoes.
Additionally, because dogs sweat through their paw pads, excessive fur traps this moisture. The combination of warmth, moisture, and trapped dirt frequently results in painful bacterial infections, hot spots, and obsessive paw licking.
Essential Tools for Safe Paw Pad Grooming
Grooming your dog at home is a rewarding experience, but using the correct tools is paramount to preventing injuries. Attempting to trim paw pads with standard household or kitchen scissors is one of the most common mistakes pet owners make—and one of the most dangerous.
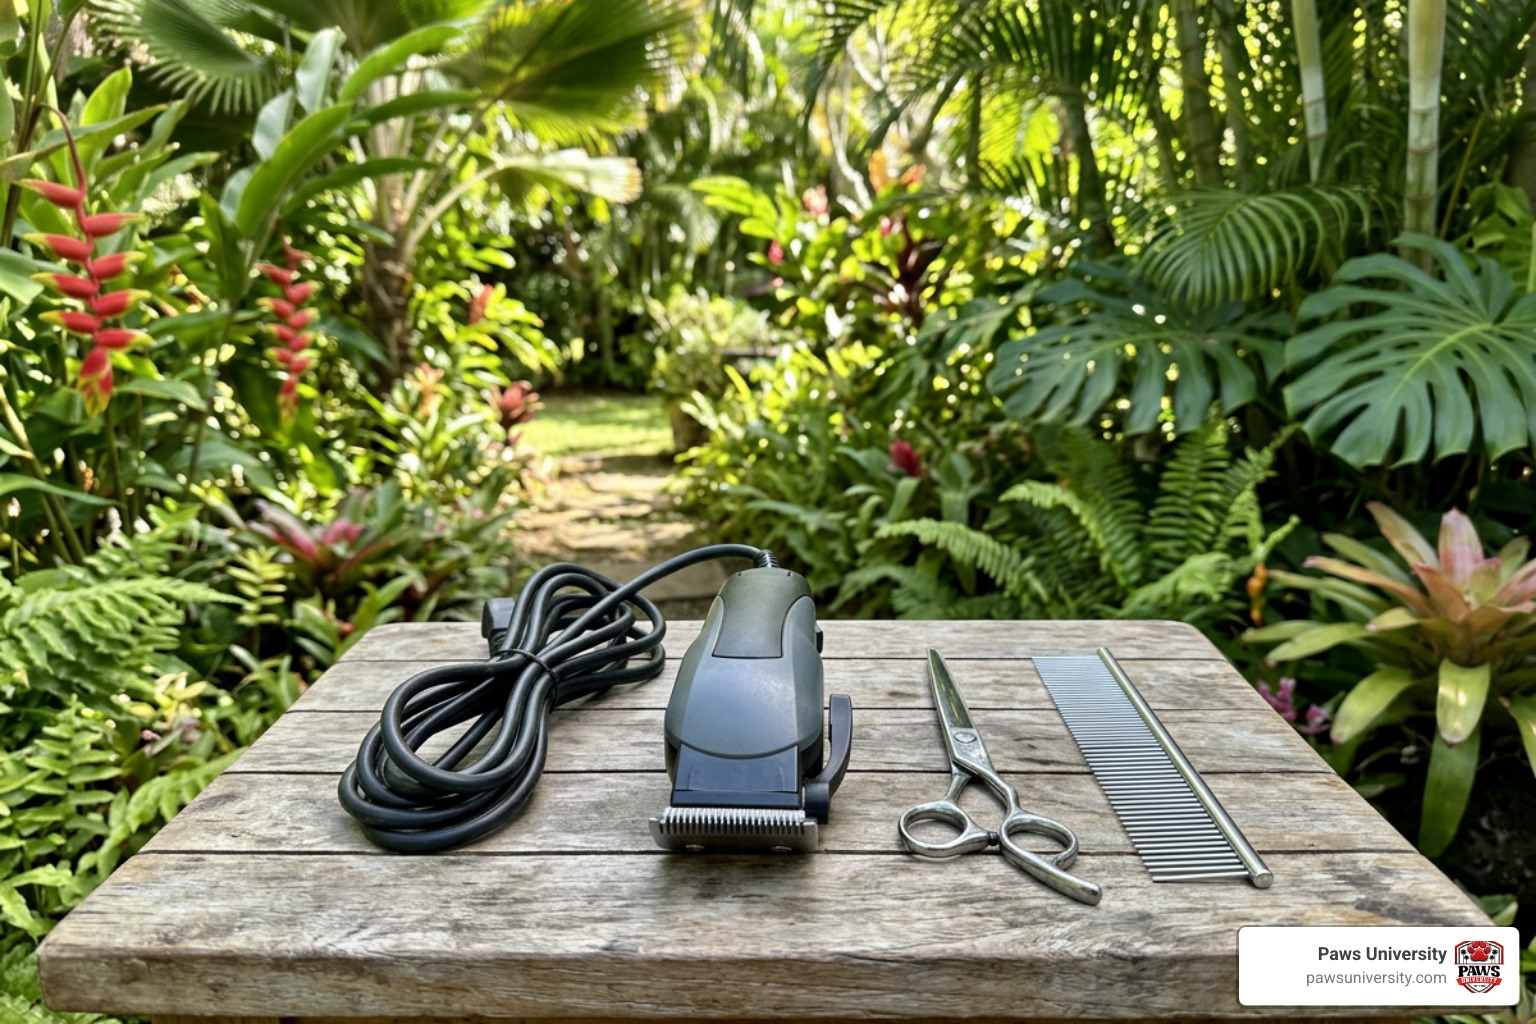
To set yourself up for success, we recommend gathering the following supplies before you begin:
- Electric pet clippers or mini trimmers: The safest and most efficient tool for the job.
- Blunt-nosed grooming scissors: Excellent for light detail work and shaping the perimeter of the paw.
- Grooming comb or slicker brush: To lift the hair out from between the pads before trimming.
- Styptic powder: A must-have safety precaution to instantly stop bleeding in case of an accidental nick.
- High-value treats: To keep the experience positive and rewarding.
For a deeper dive into selecting home grooming equipment, check out How to Trim Your Dog's Paw Pads at Home: A Complete Guide.
Why Clippers and Trimmers Beat Scissors
While it might seem easier to grab a pair of scissors, electric clippers are vastly superior for dog paw pad trimming. Dogs have incredibly thin, sensitive skin folds between their toes. If a dog flinches or wiggles while you are using sharp scissors, it is incredibly easy to accidentally cut the webbing of their foot or slice a paw pad.
Electric trimmers, especially mini-trimmers designed for detail work, glide safely over the leathery pads without cutting the skin. They allow you to clear out the hair quickly and evenly, minimizing the risk of nicks and making the process much more comfortable for your dog.
Selecting the Right Blade Settings
If you are using professional grooming clippers, understanding blade sizes is key. The blades used on most pets for paw pads will range from a #10 to a #40.
- #10 Blade: Leaves the hair slightly longer (about 1.6mm). It is highly recommended for beginners because it provides a safe buffer distance from the skin.
- #15 or #30 Blade: A medium setting often used by experienced groomers for a cleaner, tighter look.
- #40 Blade: Cuts very close to the skin. While it provides the longest-lasting trim, it should be used with a very light touch to avoid clipper burn.
- 5-in-1 Adjustable Blade: Many modern cordless trimmers feature an adjustable blade that allows you to easily switch between these lengths.
Pro-Tip: Always monitor the heat of your clipper blades! Running clippers for extended periods causes metal blades to heat up quickly, which can easily burn your dog's sensitive skin. Touch the blade to the back of your hand frequently to ensure it is cool.
How to Prepare and Hold Your Dog Safely
The key to a successful grooming session is cooperation, not coercion. If your dog hates having their paws touched, rushing into a trim will only create fear and resistance. We believe in building trust first through positive reinforcement. If your pup needs a little extra help building confidence, our professional rewards-based training services can help them learn to love cooperative care.
Desensitizing Anxious Dogs to Dog Paw Pad Trimming
If your dog is fearful of paw handling or the sound of clippers, take a step back and desensitize them gradually over a week or two before attempting a trim:
- Paw Touch Practice: Gently touch your dog's leg and paw while feeding them high-value treats. Repeat this daily until they willingly let you hold their paw for 5 to 10 seconds without pulling away.
- Introduce the Tool: Show your dog the clippers while they are turned off, let them sniff them, and give them a treat.
- Acclimate to Noise: Turn the clippers on nearby without touching your dog, rewarding them with treats for remaining calm.
- Vibration Transfer: Touch the body of the vibrating clippers (not the blade side) to your dog's shoulder or leg so they get used to the sensation, pairing it with praise.
- One Paw per Day: When you finally begin trimming, don't feel pressured to do all four feet at once. Trimming just one paw a day keeps sessions short, sweet, and stress-free.
Proper Holding Techniques for Control
To ensure safety and control, you must hold your dog's leg in a way that is comfortable for them but secure for you. Never pull a dog's leg outward to the side, as this puts painful pressure on their shoulder and hip joints.
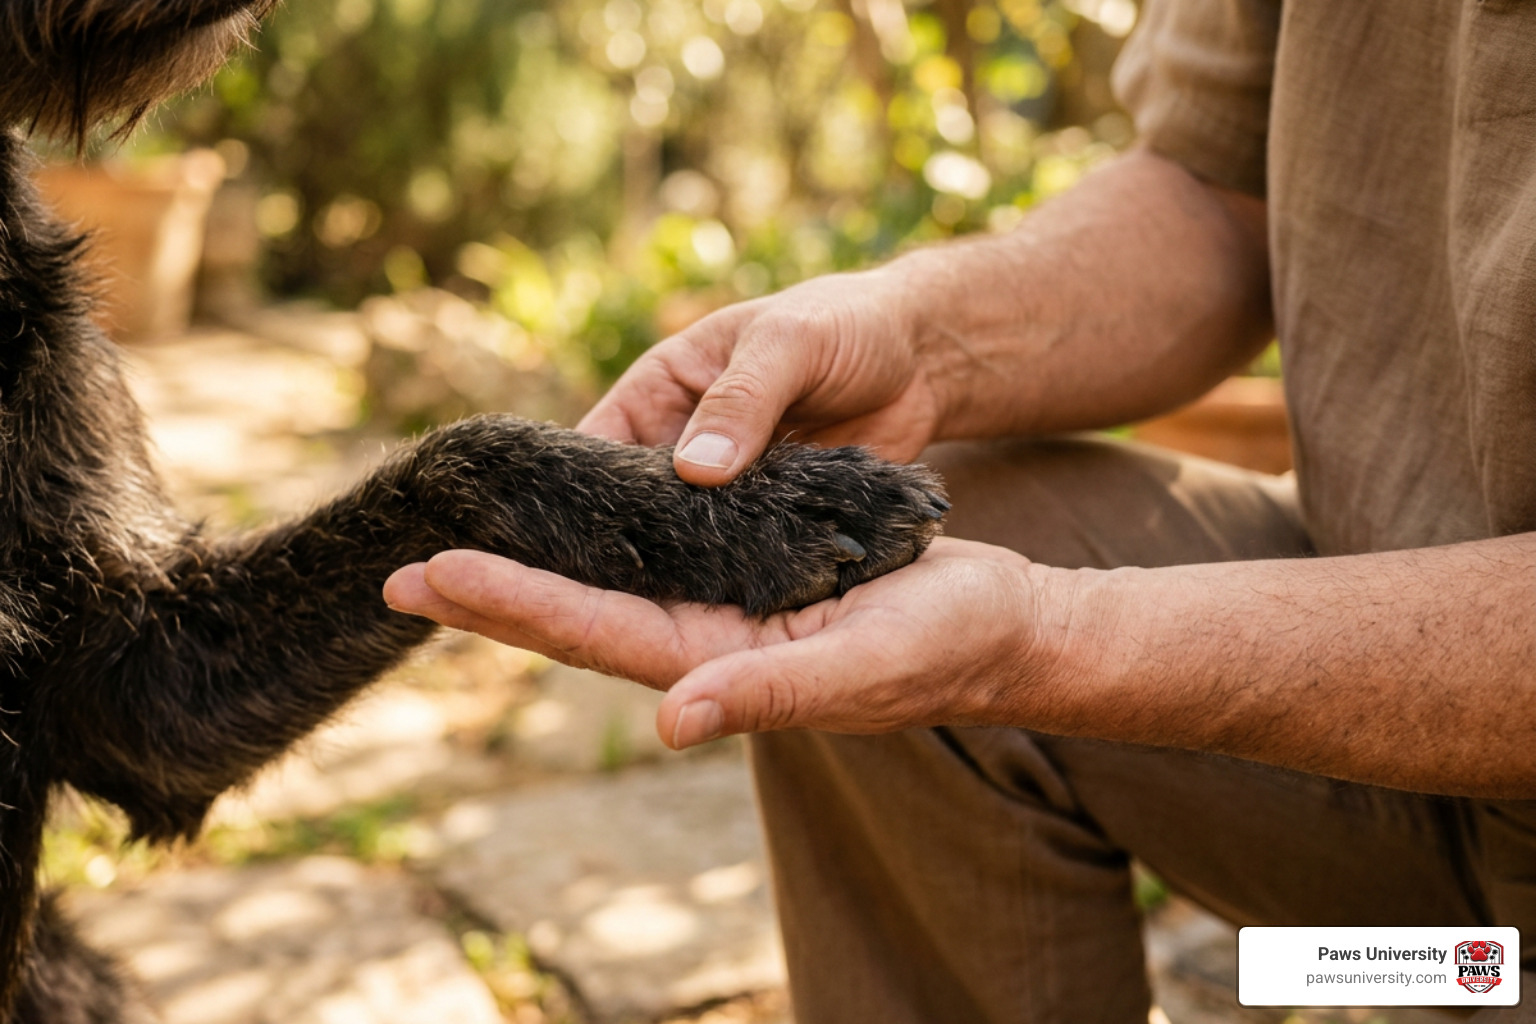
- Front Legs: Reach over your dog's back, gently lift the front leg, and bend it backward at the joint so the paw pad faces upward toward the ceiling. Support the joint with your off-hand.
- Back Legs: Gently lift the rear leg upward and slightly backward, keeping it in a natural line of movement, similar to how a farrier holds a horse's hoof.
- The Paintbrush Grip: Hold your clippers exactly like a paintbrush or a pencil, using your thumb and fingers rather than a tight fist. This gives you maximum wrist flexibility and prevents you from applying too much downward pressure on the delicate pads.
Step-by-Step Guide: 5 Methods for Safe Grooming
Now that your tools are ready and your dog is comfortable, let us dive into the actual trimming process. Always work on clean, dry feet to protect your clipper blades and prevent pulling.
Summary of Trimming Methods
| Method | Best For | Primary Tool | Key Benefit |
|---|---|---|---|
| 1. Standard Clipper Scoop | Medium to large dogs, routine maintenance | Standard clippers (#10 or #15) | Fast, even, and highly efficient |
| 2. Mini-Trimmer Detail | Toy breeds, puppies, and tight crevices | Battery-operated mini trimmers | Exceptional precision and safety |
| 3. Safety Scissors Trim | Touch-ups, noise-sensitive dogs | Blunt-nosed grooming scissors | Quiet and highly portable |
| 4. Mat Removal | Severely tangled or pelted paw hair | Clipper with a short blade (#40) | Safely gets under tight knots |
| 5. Post-Bath Clean-Up | Maximizing blade life, clean finish | Slicker brush & clippers | Easiest on tools and cleanest results |
Step-by-Step Method 1: The Standard Clipper Scoop for Dog Paw Pad Trimming
This is the go-to method used by professional groomers worldwide. It is incredibly efficient, taking only 10 to 30 seconds per foot once you master the motion.
- Comb the Hair: Use a small comb to brush the hair between the pads upward so it stands on end.
- Position the Paw: Lift the foot safely, keeping the leg close to your dog's body for stability.
- The Scooping Motion: Place the flat of the clipper blade flush against the large central pad (the metacarpal or metatarsal pad). Using a soft, bouncing, scooping motion, glide the clippers from the center pad outward toward the toes.
- Clear the Crevices: Gently use your thumb to spread the toe pads apart, exposing the narrow crevices. Lightly scoop out the excess hair, keeping the blade parallel to the pads.
- Define the Rear Edge: Finish by running the clippers in a clean line along the rear edge of the large pad to create a neat, professionally finished look.
For more expert advice on handling the paws during this process, read the vet-reviewed guide on How to Trim Hair on Dogs' Paws: 8 Vet-Reviewed Tips & Advice | The Vet Desk .
Method 2: The Mini-Trimmer Detail
For tiny toy breeds, small puppies, or dogs with incredibly tight feet, a standard clipper blade can feel too bulky. This is where mini trimmers shine.
- Choose a Narrow Blade: Use a battery-operated mini trimmer with a narrow head (often about 1 inch wide).
- Isolate the Pads: Gently press your thumb into the center of the paw to spread the small digital pads apart.
- Gently Detail: Because mini trimmers have smaller teeth, you can safely insert them into the tightest crevices between the toes. Gently skim the surface of the pads, removing only the hair that protrudes past the pad level.
- Trim the Perimeter: Use the mini trimmer to clean up the stray hairs around the outer perimeter of the toes and nails.
Method 3: The Safety Scissors Trim
If your dog absolutely refuses to tolerate the vibration of electric clippers, you can achieve a tidy look using safety shears. Learn more about safety scissor techniques in How to Trim Paw Pads - Easy Step-By-Step .
- Select the Right Shears: Always use curved grooming scissors with rounded, blunt safety tips.
- Keep Blades Parallel: Never point the tips of the scissors down into the paw. Always hold the shears completely flat and parallel to the paw pads.
- Take Small Snips: Slide the closed scissors flat against the pad, open them slightly, and take small, careful snips.
- Follow the Natural Shape: Trim the hair so it sits perfectly flush with the leathery pads. Trim the top and sides of the paw to follow its natural rounded shape.
Method 4: The Mat Removal Technique
Sometimes, outdoor play leads to severe mats forming deep between the paw pads. These cannot be brushed out and must be removed with extreme care.
- Do Not Pull: Never pull or yank on a mat, as this pulls the highly sensitive skin of the paw webbing into the knot, making it incredibly easy to cut.
- Work Under the Mat: Use a short blade (like a #40) on your clippers. Gently slide the flat of the blade under the mat, letting the clippers do the work to shave the knot away from the skin.
- Check for Debris: Mats often hide trapped sand, burrs, or grass seeds. Inspect the skin underneath immediately for redness or irritation.
- Know Your Limits: If the mats are pelted tight to the skin, do not attempt to cut them with scissors. Seek professional help to avoid severe skin tears.
Method 5: The Post-Bath Clean-Up
Deciding whether to trim before or after a bath is a common debate. While trimming dirty paws saves your dog from a wet mess, sand and dirt act like sandpaper on clipper blades. Trimming after a bath is the best way to extend the life of your tools. For a comprehensive overview of general paw hygiene, refer to How To Remove Fur From Dog Paws At Home - A Dog Groomer’s Top Tips — Healthy Happy Paws .
- Wash Thoroughly: Wash the paws with a gentle dog shampoo, making sure to massage away any trapped sand or mud.
- Dry Completely: Wet hair is elastic and difficult to cut evenly. Blow-dry or towel-dry the paws completely until the fur is fluffy.
- Comb and Clip: Brush the clean, dry hair outward. Because the hair is completely free of debris, your clippers will glide through smoothly, leaving a perfectly clean, professional finish.
Post-Trim Care and Maintenance Frequency
Once the grooming session is complete, taking a few moments for aftercare ensures your dog's paws remain healthy, hydrated, and ready for their next adventure.
How Often to Trim Paw Pads
For most long-haired or curly-coated breeds (like Poodles, Doodles, Maltese, and Golden Retrievers), a paw pad trim should be performed every 2 to 4 weeks. Smooth-coated breeds rarely need their paw pads trimmed, as their hair does not grow long enough to cover the pads.
Keep an eye out for these telltale signs that your dog is due for a trim:
- You hear their nails or fur clicking/slipping on hard floors.
- The hair is visibly wrapping around or covering their leathery pads.
- Your dog starts licking or chewing at their feet after outdoor play.
If you are also maintaining their nails, check out How to Trim Dog Nails: Step-by-Step | Purina US to keep their entire foot in perfect health.
Aftercare and Moisturizing Tips
Just like our skin, a dog's paw pads can become dry, cracked, and irritated, especially when exposed to warm tropical sand or rough volcanic gravel.
- Inspect the Paws: Immediately after trimming, inspect the skin between the toes for any signs of redness, irritation, or minor nicks.
- Moisturize: Apply a tiny amount of organic coconut oil or a dog-specific paw balm to the pads. This helps soothe the skin, lock in moisture, and prevent painful cracking. Avoid human lotions, which can soften the pads too much and make them prone to tearing.
- Prevent Licking: Keep your dog distracted with a high-value treat or a toy for a few minutes after application to allow the balm to absorb fully.
Frequently Asked Questions About Paw Pad Care
What are the most common mistakes to avoid during paw trimming?
The most common mistake is using large, pointed household scissors, which carry a very high risk of puncturing the delicate skin between the toes. Another mistake is applying too much downward pressure with clippers, which can cause painful clipper burn. Always keep your strokes light and flush to the pads, and never rush the process. If your dog is wiggly, take a break and try again later.
When should I consult a professional groomer or veterinarian?
You should seek professional assistance if your dog's paw hair is severely matted down to the skin, as removing these mats safely requires specialized equipment and expertise. Additionally, if your dog shows extreme fear, aggression, or anxiety during paw handling, a professional groomer can handle the task safely. If you notice signs of skin infections, deep cuts, bleeding, or if your dog is limping, consult your veterinarian immediately.
How do I stop bleeding if I accidentally nick a paw pad?
If you accidentally nick a paw pad or cut a nail too short, remain calm—dogs easily pick up on our panic. Press a clean cloth firmly against the wound to apply gentle pressure. Apply a generous amount of styptic powder directly to the cut to stop the bleeding instantly. If you do not have styptic powder, cornstarch or baking flour can work in a pinch. Keep your dog quiet and off their feet for a short while, and contact your vet if the bleeding does not stop after a few minutes of continuous pressure.
Conclusion
Regular dog paw pad trimming is a simple yet vital grooming task that keeps your canine companion moving comfortably, safely, and happily. By taking the time to desensitize your dog, choosing the right tools, and mastering a gentle scooping technique, you can easily turn this routine chore into a bonding experience.
If your dog is hesitant about paw handling, or if you simply prefer to leave the grooming to the experts, we are here to help. At Paws University, West Hawaii's premier pet facility since 2002, our seven-acre campus in Hawaii County offers a safe, fun, and tropical environment for your beloved pet. We provide premium grooming services tailored to your dog's unique needs, ensuring their paws are always clean, trimmed, and ready for play. Reach out to us today to schedule your dog's next pampering session!